CoVe, the Contour Vectorizer
CoVe (for Contour Vectorizer) is the name of a tool which lets users generate vector line objects from visual lines in raster graphics templates. Despite of its original name, it is not limited to contour lines.
The basic line vectorization in a bitmap image always follows the below steps: 1) Choose bitmap image to work on. 2) Classify colors in the image into groups and produce color-reduced image. Choose which colors correspond to the lines of interest. 3) Perform line thinning and run vectorization. Store the resulting lines into the map.
The tool offers a number of tuning options. They are, however, not required on good quality images.
Starting CoVe
The vectorizer tool is started from the actions offered by the “Edit” button in the template list widget. Note that this tool is available only for raster graphics templates (e.g. JPG, PNG, TIFF), not for vector graphics (e.g. DXF, OSM, SHP).

The “Image” tab
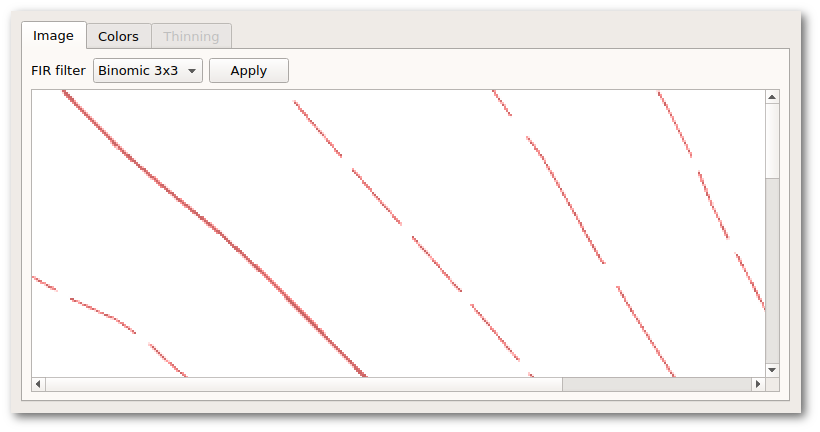
The “Image” tab is the first one displayed after starting the vectorizer tool. It shows the original image and offers tools which allow to reduce certain types of noise, e.g. from scanning of old maps. These tools operate only in memory, i.e. they do not alter the original template image.
The “Colors” tab
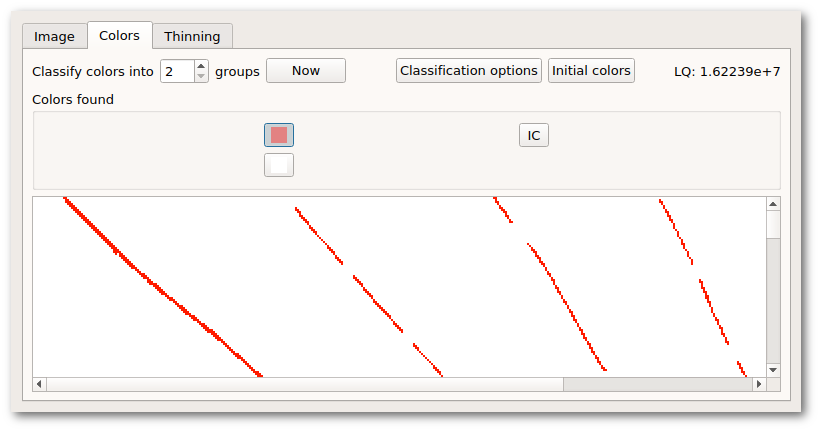
This tab offers color classification and selection. Color classification analyzes the image for a small set of key colors. After classification, the user must select the color (or maybe multiple colors) which shall be subject to vectorization.
The most important control on this tab is the number of colors to be identified in the image. For simple two-color images where there only the objects of interest, the default setting of “2” is sufficient. However, for real scanned maps the number will typically be in the range of 15-20. The reason is that overprinting and color bleeding will create new color combinations which must be identified by the tool.
The “Thinning” tab
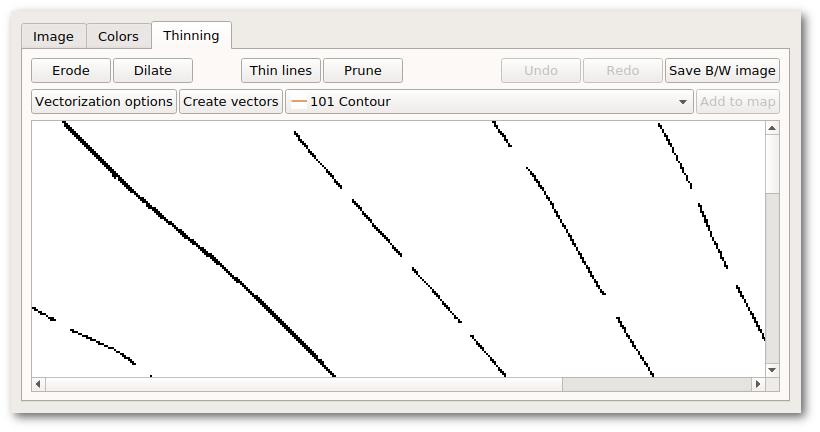
This tab provides the final steps of vectorization. It shows a black/white image based on the color(s) selected by the user on the previous tab. Apart from the actual vectorization steps, it offers morphological manipulation steps which are essential for a successful vectorization of the image. For these morphological operations, there are also undo and redo actions.
Erode
This tool removes a small margin from every shape in the image. Individual pixels and thin lines will disappear after this operation.
Dilate
This tool adds a small margin to every shape in the image. In particular, this tool is useful when the pixels of an expected vector line are direct neighbors diagonally but not horizontally or vertically.
Thin lines
This tool is used to reduce thick shapes to minimal skeletons suitable for the vectorizer. You will always use this tool just before creating the vectors.
Note that this tool may take some time to complete its task, and it is not possible to report progress accurately.
The algorithm may create line endings which do not accurately match what a human would expect, e.g. small forks or arcs. This is normal, but in some cases it may negatively affect the result of the “Create vectors” step.
Prune
This tool removes pixels from line ends. In that way, it is possible to mitigate the artifacts created by the previous step if needed.
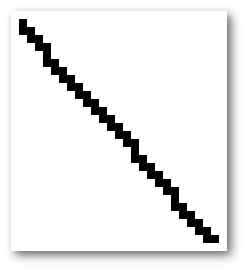
Example
Original black/white image. Note that some pixels are neighboring only diagonally:
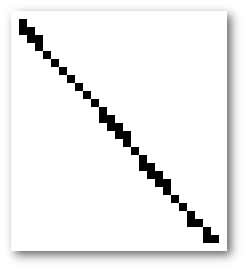
Image after “Dilate” step:
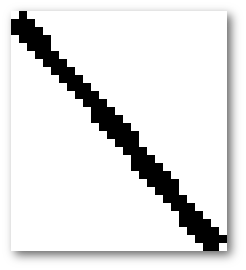
Image after “Thin lines” step. Note the small fork at the top-left end:

Image after “Prune” step:
Combinations of tools
Dilate-erode
This combination fills small gaps and missing pixels in lines and smooths the lines by removing small turns. However, it will also meld closely spaced lines.
Erode-dilate
This combination makes all single-pixel objects disappear. This is useful for removing noise from the picture when the main objects in the are thick enough to survive the erosion.
Vectorization and adding to the map
The “Create vectors” button starts the actual vectorization process, creating a temporary preview. The user may adjust vectorization options. For example, it is possible to automatically close small gaps, e.g. from dashed lines in the image.
“Add to map” finally adds the preview objects to the map, with the symbol selected in front of this button. Note that this button does not close the window. You may continue with another color, by selecting the “Color” tab again.
All objects added by this tool carry a tag “generator” with value “cove”.